如同 EMC + VMware ,Dell Equallogic 主要也可以直接搭配 XenServer 来使用,所以我也将这一台 Dell EqualLogic PS5000 当成 XenServer 的储存端 SRs(Storage Repositories) ,但是一连接上去就出问题了 "SR_BACKEND_FAILURE_170 – Equallogic Target versiob unsupported"!!
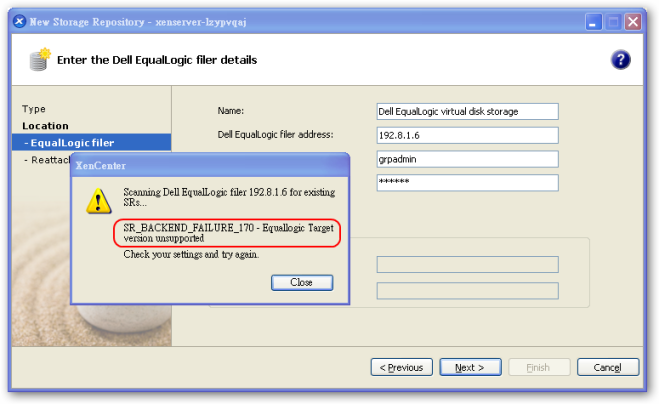
上网查了一下原来 EqualLogic 要当 XenServer 5.0 的 SRs(Storage Repositories) 必须为 4.0.1. 以上的版本才能使用.因为不是自己买的所以现在还在等待经销商的 firmware.
http://forums.citrix.com/message.jspa?messageID=1373090
这一台 Dell EqualLogic PS5000 是跟厂商借来试用看看的.Dell EqualLogic PS5000 是一台什麽东西呢!!!他是一台 "纯" iSCSI 的 SAN,详细配备请看官方网站.
机器送来之后慌了要怎麽开始,要透过什麽去连接呢!!看到后面背板有3个 Gega Byte Ethernet,和一个 Serial Port.没人知道要怎麽连接,记得上一次 Dell 的 Sales 讲的好像很简单什麽东西都不用设定已经完成了所有设定.幸好隔天经销商就送来使用光碟,看了一下如果你的 Client 是 Windows 会有一套软体可以使用.(HIT) Host Integration Tools ,使用上也很简单设定一下就可以开始用了!!如果你的控置端是非 Windows 系统(如 Linux)就需要透过 Serial port 去设定了!!
• 9600 baud
• 1 STOP bit
• No parity
• 8 data bits
• No hardware flow control
Dell EqualLogic – update firmware
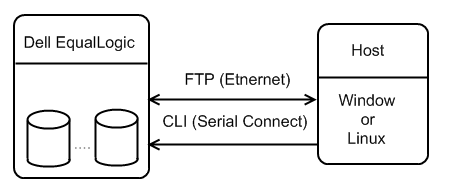
因为先前的版本不能在 XenServer 下使用(EqualLogic firmware 4.0.1. 以上的版本才能使用)所以跟厂商要了新版的 firmware 更新方式也很简单,不过更新只能透过 serial port 或是透过 telnet / SSH 去连接 Ethernet port(Group IP address 不适用) 使用 CLI 方式更新.
firmware 的档桉名称为 kit-verion.tgz 如果是拿到 .zip 记得将他先解开.
接下来要找一台 Host 具有 ftp client 功能的 Desktop / Server 皆可!! EqualLogic 预设有开启 FTP Server 的功能,而且这是唯一能将firmware 上载到 EqualLogic 的唯一方式!!假设我的 EqualLogic IP 为 192.8.1.6

回到 EqualLogic 执行 "update" 更新 firmware.EqualLogic 预设的 Serial port 设定如下.
• 9600 baud
• 1 STOP bit
• No parity
• 8 data bits
• No hardware flow control
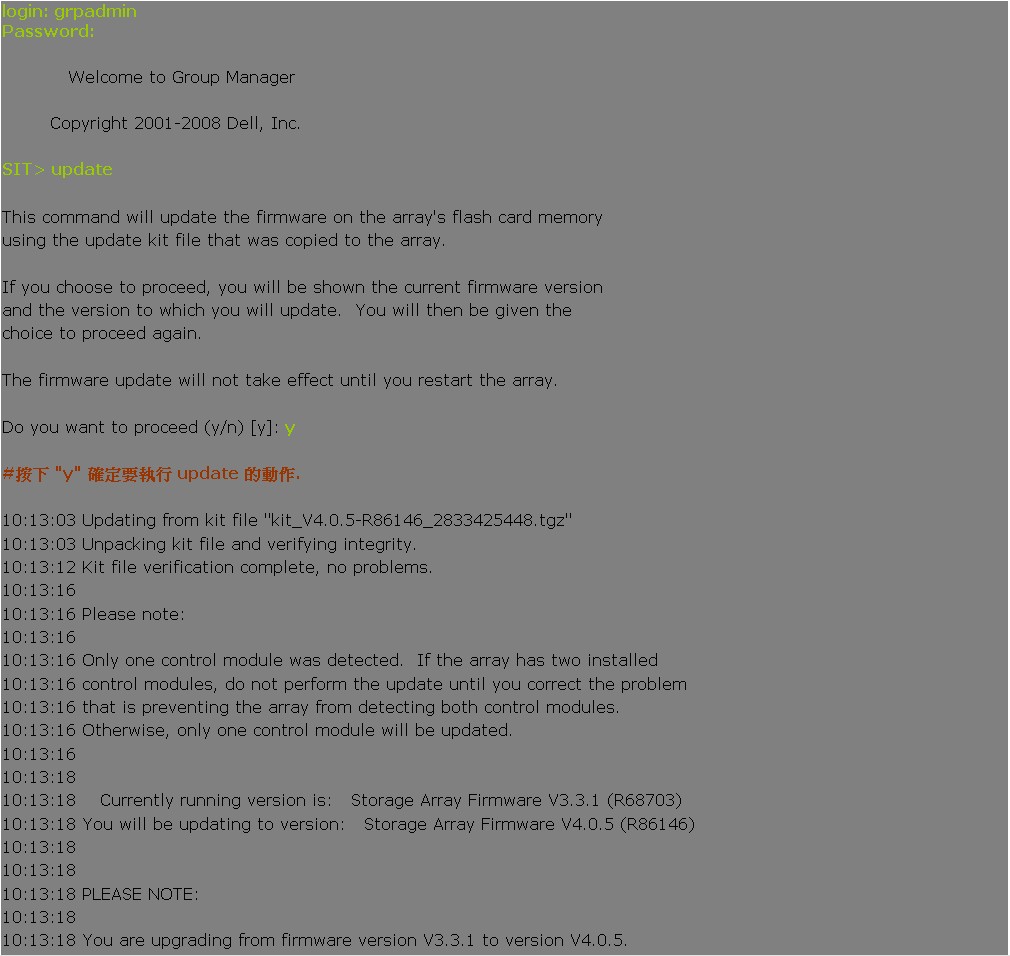
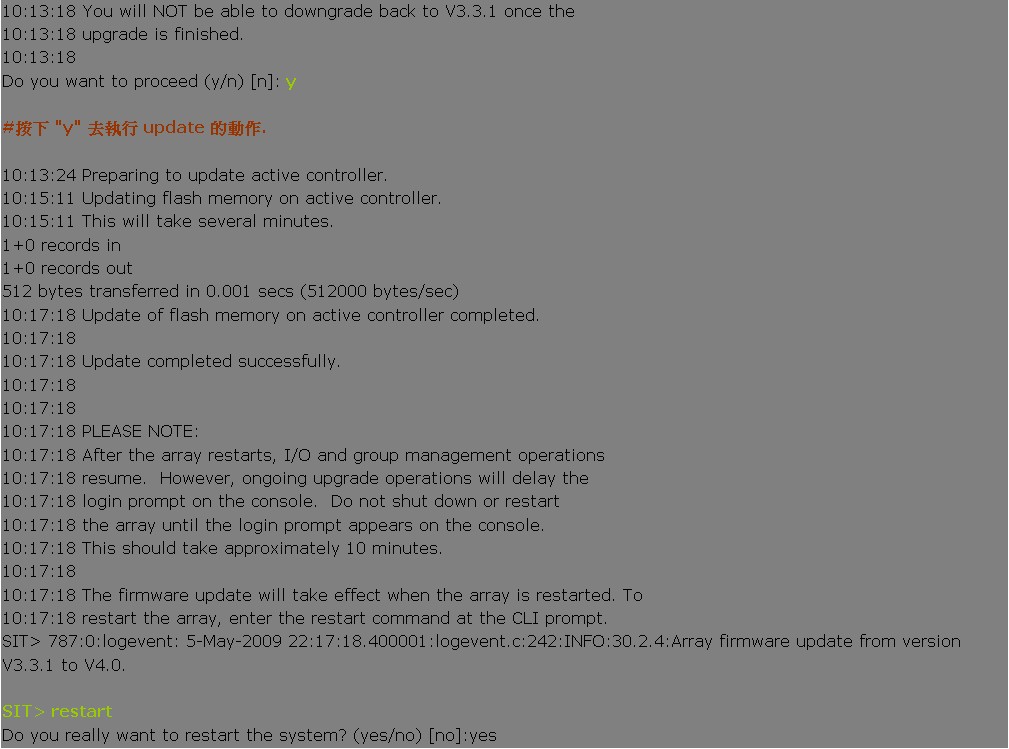
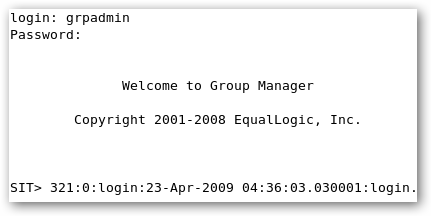
firmware 更新需要重新开机才会生效.重心开机的指令为 "restart",关机前先检视一下是否目前还有 iSCSI Initiator 连接到这一台的 group volumes.iSCSI Initiator 最好是先行离线再关机.开机后重新登入 EqualLogic
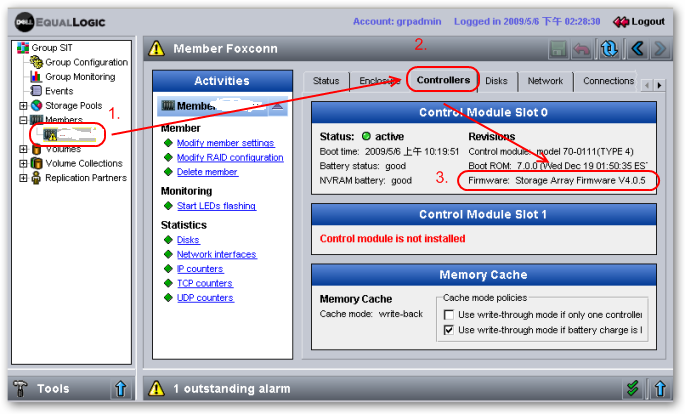
在 GUI Web 可以在 leftmost panel 的 members list / member name 的 right panel Controllers tab 看到目前 firmware 版本!!
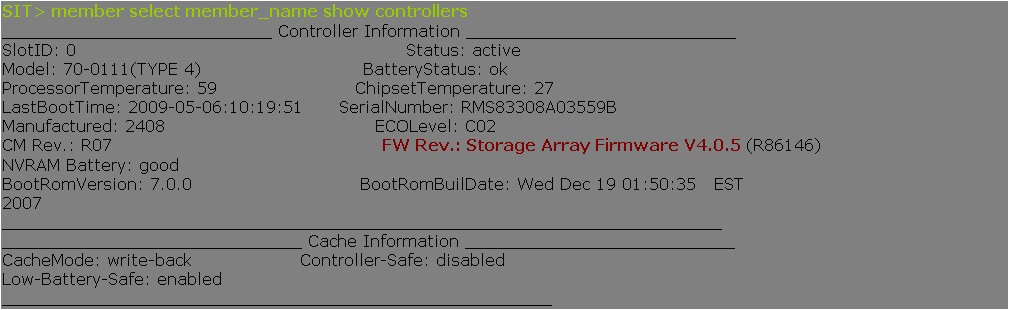
在 CLI 可以使用指令 member select member_name show controllers 看到目前 firmware 版本!!
firmware 更新后就可以透过 XenServer 去连接 Dell EqualLogic
Dell EqualLogic + XenServer
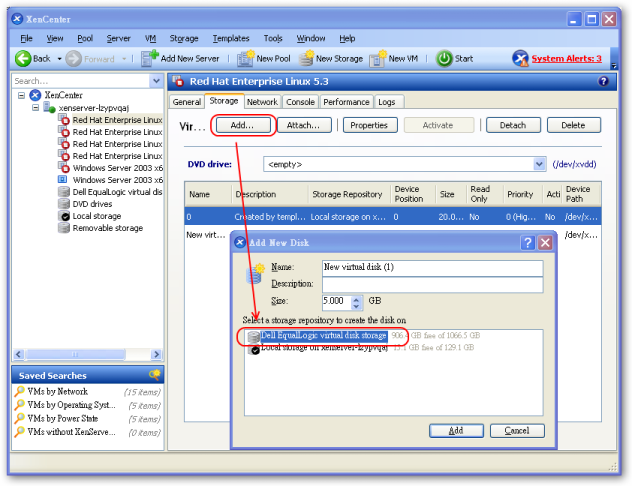
之 前在使用 XenServer 时就发现再新增 Storage Repository 有一个很特别的选项就是 "Dell EqualLogic" 原来这是一台 iSCSI 的装置,也刚好最近跟厂商借来用用看,发现 XenServer + EqualLogic 其实还算是一个不错的搭配.只要透过 3 个步骤就可以将 EqualLogic 整合到 XenServer 上使用!!不需要再透过 Web 的方式去设定硬碟大小以及指定 Initiator 端,完全都可以在 XenCenter 上直接使用.
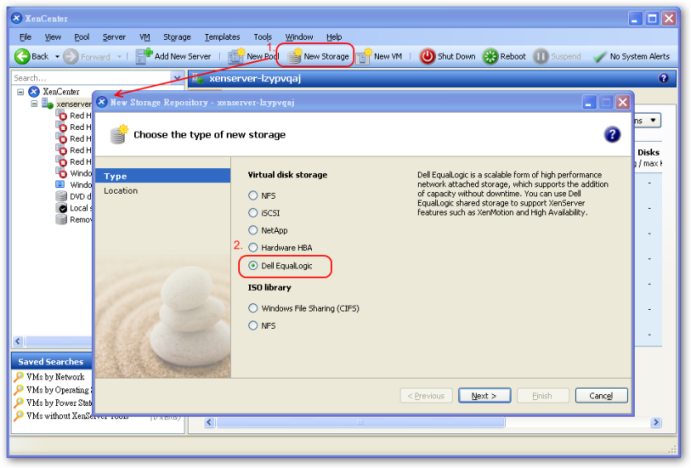
选择新增 "New Storage" 并在 "virtual Disk Storage" 选择 Dell EqualLogic.
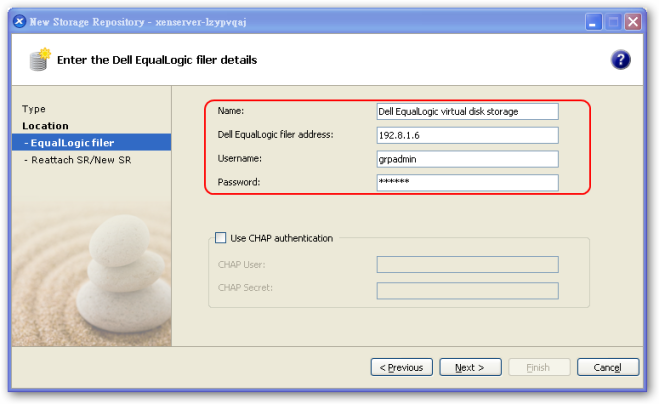
输入 Dell EqualLogic 的 IP / Username / Password.Username 就使用 grpadmin , IP/Password 就要看当初所设定的
这是环境的第一台所以选择 "Create a new SR"
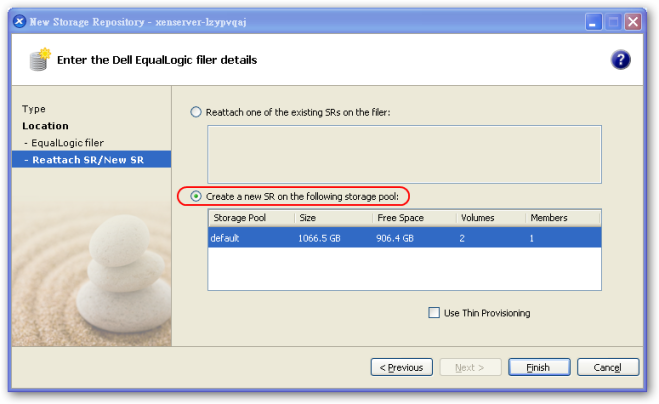
我们可以勾选 Thin Provisioning 的这一项功能功能,启动后分配给该 Volume 的容量将是逻辑容量并不会真实占据 Dell EqualLogic 的空间.,而系统会依据实际资料量逐步将空间分配给该 Volume ,已让该储存装置资源的利用率可大为提?.在新增 Disk 时就可以看到多了一个选择 " Dell EqualLogic virtual disk storage"